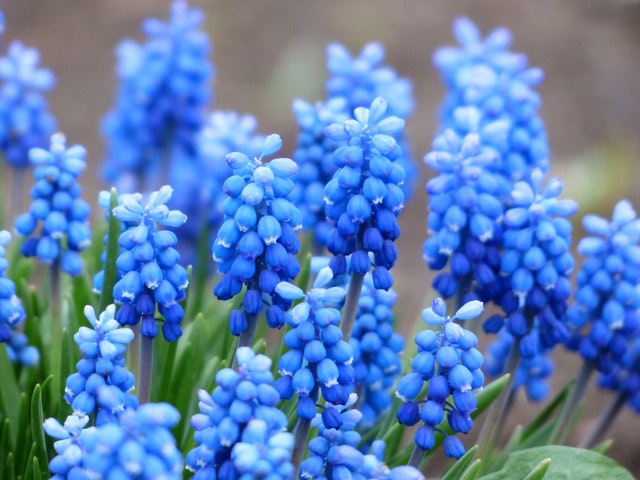
Preparing For Planting

This is an excerpt from the Book called “Planting Design Essentials”  by Jill Anderson and Pamela Johnson. Continue reading to learn more about Preparing For Planting, thanks to the author.

What makes plants Grow?  Improving the soil, using compost, tools, how to plant, mulching. 

Successful planting design relies on composing together all the aesthetic elements of plants such as shape, form, scale, contrast and colour.  But for real long-term garden success there also has to be an understanding of plant ecology:  How plants grown, how they are affected by different types of soil and what they need for optimum growth.  Having spent time and energy planning a planting design, make sure that the essential requirements, such as good soil, are available for plants and that proper planting techniques will be used to get the plants off to a good start. 

Quite simply, a plant needs water, food and light to grow.  The roots anchor the plant into the soil and stabilize it, reacheing deep down to access the water and nutrients that it needs.  A well-established, mature plant has an extensive root system resulting in a large surface area that allows maximum absorption of resources form the surrounding soil.  However, a new plant can only take up a restricted amount of water and nutrients, because it has an immature root system and a small number of leaves that limit the level of photosynthesis.  The fine root hairs of bare-rooted or larger transplanted shrubs also face difficulty, because some of them will invitably have been damaged when beign dug up.  “They may need watering in dry periods until the roots can grow and penetrate out into the soil.  Whatever the type of plant, the aim is to make the planting hole as welcoming as possiblie by introducing a mixture of soil and compost that small roots can easily work their way into, in order eventually to develop a network of strong roots. 

Improving the soil 

Most of us seek to improve our gardens by spending time and money on plants, but often gardeners are not aware of the need to nurture the soil, and how much the quality of the soil in our garden affects the growth of plants.  Think of soil as the life blood of the garden, a living organism that sustains all living things and determines not only what grows but also how well it grows, and you will have some idea of its significance. 

In nature thereis great competition between plants for nutrients, space and light; stronger plants will survive over weaker, smaller onles, ensuring that they have enougth resources to grow.  There is an ebb and flow, with some plants fruiting and flowering at certain times of the year, then dying back to a period of stillness.  The soil is slowly replenished by falling leaves and organic debris that gradually decays and replenishes the soil.

Improving the soil

The modern garden is a different story.  We pack plants in closely together and expect all of them including trees, shrubs, flowers, herbs, fruit, vegetables and hedges-to be both highly productive and ornamental.  Unless simple measures to improve the fertility and structure of the soil are taken, such dense planting will repidly deplete the soil of nutrients. 

The levels of acidity or alkalinity (PH) in the soil may also determine what plants can be grown in you’re garden because it can affect how nutrients are taken up by the plant.  Rhododendrons and Camellias thrive on acide soil, because the necessary nutrients are available to them, but when grown on an alkaline soil the nutrients remain locked up in the soil and unavailable.  If you think that your soil is alkaline or acidic then it’s worth testing it to establish the level and give you more information about what plants will thrive.  This is easily done with a readily available soil testing kit. 

 Soil Structure 

Soil structure describes the texture and consistency of soil, ideally for most plants, the soil will look dark brown, rich and crumbly.  This formation allows the soil to hold onto water long enough for the plant o take up moisture and nutuients and then to gradually drain and not become waterlogged. 

Of course, some plants don’t suit these conditions, those of Mediterranean origin prefer light, well-drained soil that is relatively poor in nutrients and will fail if planted in rich soil.  Conversely plants from boggy regions have adapted to those conditions and won’t survive in light sandy soil.  A knowledge of a plant’s origin will indicate the most suitable conditions for a plant. 

Soil Types 

A basic understanding of the type of soil in your garden is necessary to know, not only what type of plants will be best suited to it, but also what steps can be taken to provide the best growing medium that has the appropriate level of nutrients in it. 

There are three main types of soil. 

  • Clay soil is heavy, easily water-logged in winter but slow to dry out in summer.  It can be slow to warm up in spring because of the high water content, but this also results in it having a higher nutrient content than sandy or chalky soil. 
  • Sandy soil is light, well-drained and has a low nutrient content because they are leached from the soil as it drains.  Its lightness makes it easier to work with a it warms up in the spring so seeds will germinate more quickly and plants root more quickly. 
  • Chalky soil is alkaline, light and well drained usually with just a thin layer of top soil so it lacks nutrients 

The good news is that there is a universal solution for improvement, whatever tyour type of soil.  Add copious amounts of well-rotted manure or compost, annually as a mulch, preferably to a depth of 8-10cm. Use it alsowhen planting by mixing it with garden soil when backfilling the planting hole.  This improves the soil whatever its type, helping light soils to hang on to nutrients and moisture, and providing clay soils with a better structure so that they drain well and don’t become waterlogged.

Using Compost 

Compost is a confusing term that applies to many different planting mediums, including the bagged compost from garden centes used in hanging baskets and plant pots, often called multi-purpose compost.  It also refers to John innes potting composts that are slightly heavier, soil-based and used for potting-on plants into larger containers as they mature.  These types of compost are specifically made for particular jobs and are not beneficial for improving soil in the garden. 

Peat was commonly used in compost in the past, but we are discouraged from using it now as it is recognized that we are rapidly depleting this slowly produced resouce, which also provides a valuable habitat in its local environment for specific wildlife.  There are plenty of alternatives for gardeners to use, so check that any compost you buy does not contain peat.

Plants

If you buy compost look for those that are made from material rotted down over time from organic matter and referred to as ‘organic compost’ or ‘soil improver’.  But the best type of compost is made from material composted in your own garden-it’s cheap, convenient, environmentally-friendly and you know exactly what’s in it. 

Making Your Own Compost 

Try to avoid having bonfires in your garden; they release CO2 into the atmosphere, and you miss the opportunity of convertin a freely available by-product, such as leaves and selected garden waste, into a valuable resouce for your garden. 

Making compost is quite straighforward and easy to do, once a routine is established.  The rewards will soon be apparent in your garden; it is hard to imagine how such benefits can result from a very straightforward process.  Homemade compost is simply the best method of improving hw your garden growsm and it’s easy to see why compost is often referred to as black gold. 

The process works on the simply principle that all living things decay and turn into humus(decomposed arganic matter); bacteria feed on air that is incorporated into the compost (aerobic decomposition); and rich, crumbly nitrogen-rich compost is the result. 

Do not use diseased or pest-affected plants, roots of perennial weeds such as dandelion or bindweed, or cooked food.  If you have used any chemicals on your lawn, then wait two or three weeks before the clippings are included in the heap. 

Leaf-Mould Compost 

 Fallen leaves are best treated separately from general garden compost, because they take longer to rot down into leaf-mould.  This is a satisfying method of using up something commonly thought of as waste from your garden and turning it into a valuable commodity to improve the soil.  All deciduous leaves rot down eventually, though some take longer than others; oak, alder and hornbeam are the quickest, whilst sycamore, beech, sweet-chestnut and horsechestnut take the longest.  Take care when collecting leaves in the autumn and winter from under hedges as hedgehogs and other creatures may be hibernating there. 

If there are only a small number of fallen leaves in your garden each autumn, simply gater them up and store them in a plastic bin-bag; punch a few holes in the sides with a garden fork, springkle the contents lightly with water, tie up the bag and store out of the way for a year or two.  Check occasionally to stir up the contents and ensure that they haven’t dried out, especially in the summer. 

If your garden produces lots of leaves and you have space, then one or two custom-made compost bins will work well.  Chicken-wire or some form of netting attached to four posts in the ground is all you need to make a container.  Turn the contents very occasionally to mix the dryer sides into the centre to help the process along. 

The resulting leaf-mould can be used either as a mulch or dug into the soil to improve its structure. 

Fertilizers 

The basic garden fertilizers are nitrogen, phosphorus and potassium, available in both organic and inorganic forms.  Well-conditioned soils usually contain most of the nutrients that a plant needs to grow, but improging the level of nutrients may be necessary when growing hungry plants such as vegetables, perennials and annuals that make a lot of grwith in one season. 

Inorganic Fertilizer 

The inorganic or chemical types are easily available from garden centres.  Most have an information panel that gives the ratio of the content, expressed as N:P:K. 

(N is the chemical symbol for nitrogen, P for potasium and K for Phosphorus.) 

A ratio of 7:7:7 is a balanced fertilizer with equal quantities of each, wheas 4:2:6 has a higher ratio of potassium and is used to encourage flowers and fruit.  These inorganic fertilizers are produced in a form that is readily available to plants, and therefore they are quickly absorbed by the plant.  But they also leeck out quickly into the soil and are not of benefit for very long, so they have to be applied regularly and can be expensive.

Soil Structure
Soil Structure

Organic Fertilizer 

Organic fertilizers originate from plant material such as seaweed and animal products, for example blood, fish and bone or pelleted chicken manure.  Liquid fertilizers, such as comfrey or nettle tea, can be made from the bruised leaves of the plants theat are then left to soak in a suitable lidded container.  The resultant liquid is then diluted in water to produce a free, effective fertilizer.  Organic fertilizers release their ingredients more slowly and usually need a period of time after application to break-down in the soil and become available to plants. 

Preparing The Site for Planting 

Some weeks before you are ready to plant, maybe whilst you’re choosing plants or waiting for the right time to plant, you can begin preparing the soil. 

Dealing With Weeds 

Determind, perennial weeds will need to be eradicated permanently or they will continue to reappear.  They will be difficult to remove if they’re growing through the new planting and will compete with the new plants for resources.  Patience is needed if you garden organically because all the methods described take time to be effective. 

Beware of trying to dig up intransigent weeds such as bindweed, because they can indvertently be propagated when tiny pieces of root are left behind in the soil.  The simplest method of eliminating weeds without using chemicals is to regularly cut them back; this weakens them, and eventually they just give up. 

An area of weeds can also be killed by coveing with a strong material such as polythene, which blocks out light and rainfall and eventually kills them, although it has to be said that most materials do look unsightly.   

If you are prepared to use chemicals then glyphosate is very effective, killing plants right back to their root.  Take care when applying it because it kills off any neighbouring plants that it also touches.  It is only effective when used as the plat is growing, so shouldn’t be used during the winter.  Large plats can be cut back and reduced in size so that only a few leaves near the base have to be treated. 

Whilst preparing the soil remember that although you can compost green waste, do not include the roots of weeds such as couch grass, bindweed, ground elder or other perennial weeds, or plats that have been treated with weed-killer. 

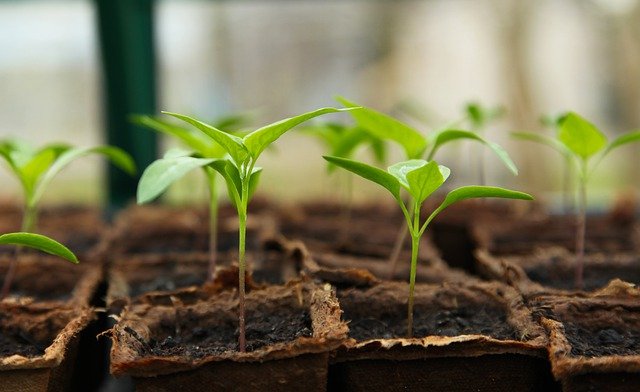
Adding Fertilizer and Compost 

Dig in some fertilizer, such as chicken manure pellets, a couple of weeks in advance of planting to give them time to break down into the soil.  And if you don’t have enough of your own compost, order plenty of soil-improving compost. 

Moving Established Shrubs 

It’s unlikely that you’re starting with a garden that is completely devoid of plants, so some of the preparation may include either moving some shrubs to a new place in your garden or giving them away. 

There is no guarantee of survival when moving established plants, and some species such as roses and magnolias will object strongly, possibly by giving up completely.  However, there are some measures that can be taken to reduce the risk, and choosing the right time to plant is one of them.  The best time for moving deciduous plants is from late October to the middle of March.  Evergreens are best moved during October when the soil still has some residual warmth, or late March when it is beginning to warm up again.  When polants are dug up they will continue tolose moisture through their leaves but are unable to take up any through their roots, so avoid digging up plants on sunny and warm days in autumn. 

Water the plant a few days before transplanting to let the roots take up water until they’re settled in their new position; the moist soil will be better able to stick to the roots a protect them during the move. 

Before digging up the plant prepare the new site by incorporating plenty of organic compost and forking through the soil in the base to help drainage.  Make sure that the planting hole is wider and deeper than you estimate the size of the root-ball to be.  Dig up the plant carefully, causing as little damage to the roots as possible and trying to keep some soil around the roots.  Lift it onto some form of sheeting-damp sacking would be perfect-and cover the roots to prevent them drying out until the plant is happily planted in its new position. 

If  you can’t replant it immediately-perhaps it’s going to a new home elsewhere-either put it in a pot in the shade or dig a temporary hole or trench and gently heel it in so that the roots are covered until it can be moved to its permanent position.  Many large tree nurseries have the specialist gear for moving mature trees and shrubs, and calling in a specialist could be the best choice if you have a mature tree that has to be moved.